Table of Contents
TogglePests don’t knock. They crawl through gaps, slip under siding, and march right through door sweeps looking for food, shelter, and a place to multiply. Once they’re inside, eviction gets messy, and expensive. The smarter play? Stop them at the property line with barrier pest control, a proactive perimeter defense that intercepts ants, spiders, roaches, and other crawlers before they ever breach your foundation.
Barrier pest control works by creating a treated zone around your home’s exterior, a chemical or physical line that pests either can’t cross or won’t survive crossing. It’s not a one-and-done spray job: it’s a layered system that, when applied correctly and maintained seasonally, keeps your home’s interior pest-free without constant indoor treatments. Whether you’re a DIYer with a pump sprayer or hiring it out, understanding how barriers work and where to apply them makes all the difference.
Key Takeaways
- Barrier pest control creates a treated 3- to 10-foot perimeter zone around your home’s foundation that kills or repels crawling insects before they enter, using residual insecticides that remain active for weeks or months.
- Chemical barriers using pyrethroids and other active ingredients are most effective against ants, roaches, spiders, and other crawlers, working on contact and ingestion when pests cross treated surfaces.
- Plan for three to four barrier pest control treatments annually (spring, summer, and fall) because rain, UV exposure, and foot traffic degrade active ingredients every 60 to 90 days.
- Barrier pest control reduces pesticide use indoors, protects wooden structures from carpenter ants and termites, and minimizes the need for reactive interior spraying and trapping.
- Combining chemical barrier treatments with physical exclusion methods—caulking cracks, installing door sweeps, screening vents, and trimming vegetation—creates a more effective defense than either approach alone.
- Natural alternatives like diatomaceous earth and essential oil sprays offer eco-friendly options, though they have shorter residual lives and require more frequent reapplication than synthetic barriers.
What Is Barrier Pest Control and How Does It Work?
Barrier pest control is a preventative strategy that treats the perimeter of a structure, typically a 3- to 10-foot band around the foundation, with insecticides or repellents to block pest entry. The barrier can be applied to soil, mulch, foundation walls, window frames, door thresholds, and siding. The goal is simple: create a treated zone that kills or repels crawling insects before they find cracks, weep holes, or gaps leading inside.
Most barrier treatments use residual insecticides, products that remain active on surfaces for weeks or months after application. Pyrethroids (synthetic versions of chrysanthemum-derived compounds) are the most common active ingredients in DIY and professional formulations. When an insect crosses the treated surface, it picks up microscopic particles that disrupt its nervous system, leading to paralysis and death.
The treatment works on contact and ingestion, so pests don’t need to consume bait, they just need to walk through it. This makes barriers especially effective against ants, roaches, crickets, earwigs, spiders, millipedes, and silverfish. It’s less effective against flying pests (wasps, mosquitoes) unless you’re also treating nesting sites or resting surfaces.
Barrier treatments don’t create an impenetrable force field. Rain, UV exposure, irrigation, and foot traffic all degrade the active ingredients over time. That’s why reapplication every 60 to 90 days is standard, with more frequent touch-ups in high-moisture climates or during heavy pest seasons. Many homeowners schedule treatments in early spring, mid-summer, and early fall to align with peak insect activity.
Why Barrier Pest Control Is Essential for Homeowners
Indoor pest control is reactive. Barrier pest control is proactive, and that shift in approach saves time, money, and a lot of frustration. Once pests establish themselves inside, you’re dealing with baiting, trapping, and repeat treatments in kitchens, bathrooms, and wall voids. Barriers cut the problem off at the source.
Protection from structural damage is a big reason to take perimeter defense seriously. Carpenter ants and termites don’t just annoy, they chew through framing, joists, and sill plates. Early detection is tough because the damage happens inside walls. A well-maintained barrier reduces the odds of these pests ever reaching your home’s wood structure. While barriers alone won’t replace termite-specific treatments (like soil trenching or bait systems), they’re a solid first line of defense.
Barrier treatments also reduce pesticide use indoors, which matters if you’ve got kids, pets, or respiratory sensitivities. Instead of spraying baseboards and under appliances every time you see a roach, you’re treating the exterior envelope where pests live and travel. That keeps chemical exposure outside and minimizes the need for interior applications.
Finally, barriers help with seasonal pest control challenges. Spring brings ants and termites. Summer means spiders, earwigs, and stinging insects. Fall is when crickets, stink bugs, and rodents look for warm cracks to overwinter. A year-round barrier program adjusts to these cycles, keeping pressure off your home no matter the season.
Types of Barrier Pest Control Methods
Chemical Barrier Treatments
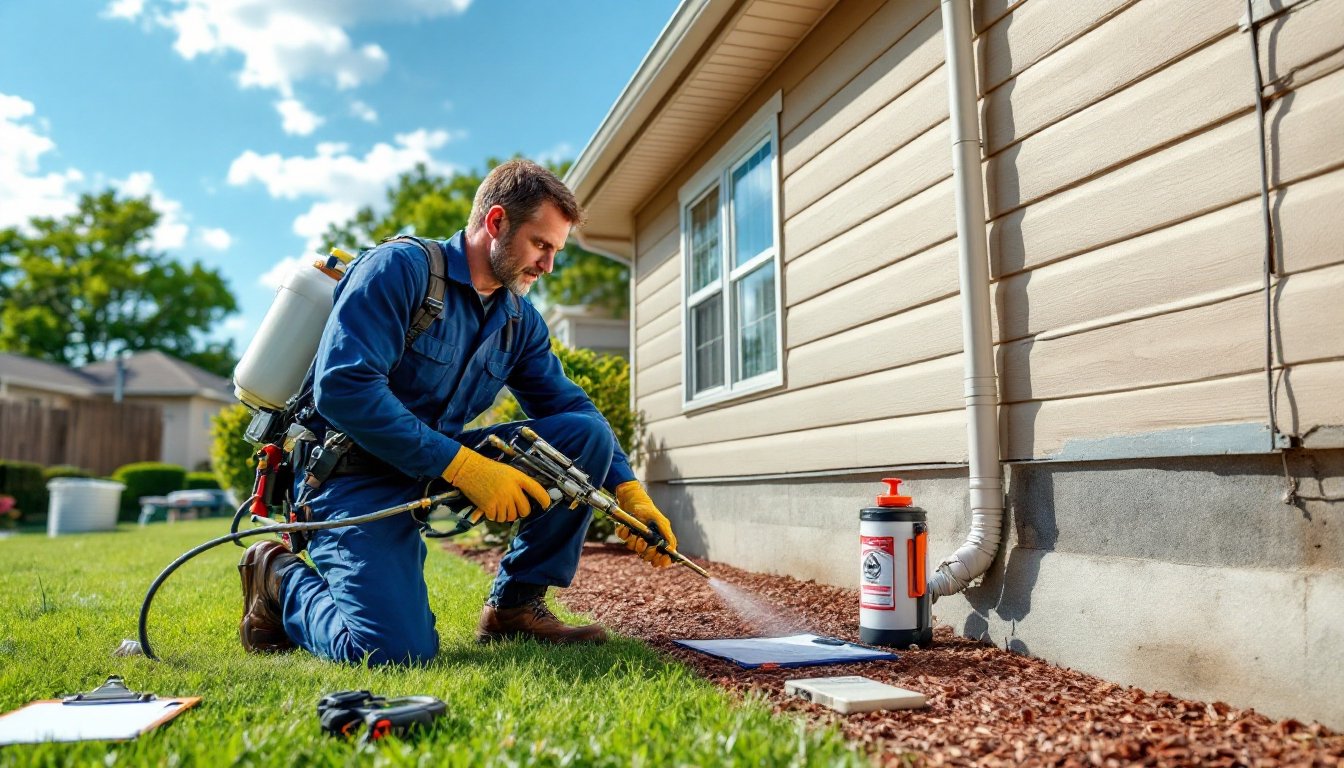
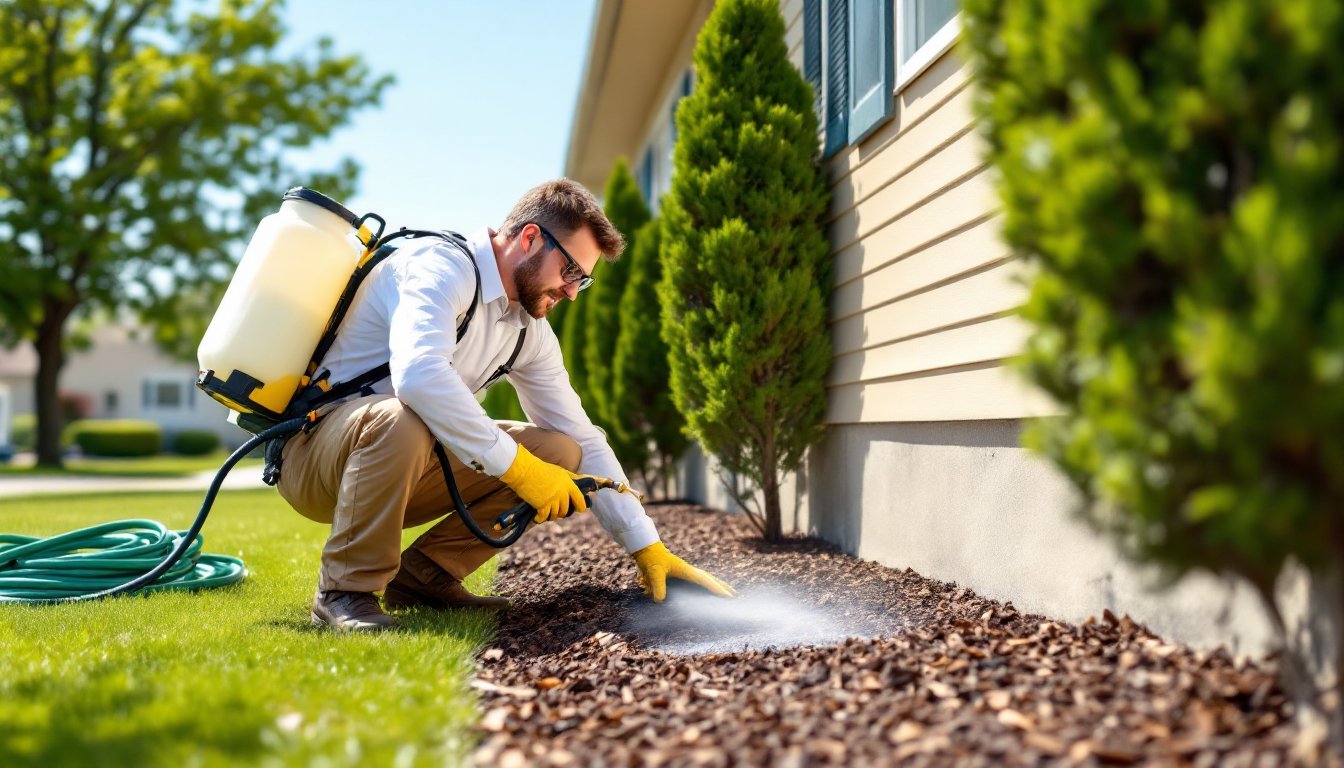
Liquid concentrate insecticides are the workhorse of barrier pest control. Products containing bifenthrin, permethrin, cyfluthrin, or lambda-cyhalothrin are widely available at home centers and farm supply stores. They’re mixed with water (often at a ratio of 0.33 to 1 oz per gallon, depending on the product) and applied with a pump sprayer or hose-end applicator.
Application targets the foundation wall (from grade up to the first-floor sill), a 3- to 10-foot band of soil or mulch around the perimeter, and any structural penetrations, hose bibs, electrical conduit entries, dryer vents, and HVAC line sets. Pay extra attention to door thresholds, window wells, and weep holes in brick veneer. These are high-traffic pest highways.
Granular insecticides are another option. Spread with a hand-crank spreader, they’re applied to mulch beds, gravel, and turf adjacent to the foundation. Granules activate when watered in, releasing the active ingredient into the top inch of soil. They’re slower-acting than liquids but can last longer in certain conditions. Some formulations also work as grub control in lawns, giving you dual-purpose coverage.
Microencapsulated formulations suspend insecticide particles in tiny capsules that break open over time, extending the product’s effective life. They’re less prone to wash-off and UV degradation than older emulsifiable concentrates. Expect to pay a bit more, but the extended residual (up to 90 days) often justifies the cost. Many professional pest control services use microencapsulated products for that reason, combined with methods detailed on sites like Today’s Homeowner for broader home maintenance strategies.
Natural and Eco-Friendly Barrier Solutions
Not everyone wants synthetic pyrethroids around their foundation, especially near vegetable gardens, wells, or pet areas. Diatomaceous earth (DE) is a non-toxic powder made from fossilized algae. It works mechanically, not chemically, microscopic sharp edges puncture insect exoskeletons, causing dehydration. Food-grade DE is safe around pets and kids but needs to stay dry to remain effective. Apply it in a thin line along the foundation, inside window tracks, and around door sweeps. Rain and irrigation wash it away, so reapplication after wet weather is a must.
Essential oil-based sprays (peppermint, clove, rosemary, cedarwood) act as repellents rather than insecticides. They won’t kill on contact, but they can deter ants, spiders, and roaches when applied consistently. The downside: short residual life, usually a week or less. You’ll need to reapply frequently, and effectiveness varies by pest species.
Physical barriers also play a role. Copper mesh stuffed into weep holes, foundation cracks, and pipe penetrations blocks entry without chemicals. It won’t corrode like steel wool and can’t be chewed through by mice. Weatherstripping on doors, caulk around window frames, and properly fitted door sweeps are all part of a mechanical barrier strategy that complements chemical or natural treatments.
Some gardeners use crushed eggshells or coarse mulches as deterrents for slugs and soft-bodied pests, creating barriers with continuous textures that pests avoid crossing, as noted in guides on managing garden slugs. While not as effective as chemical barriers for crawling insects, they’re worth layering in planting beds near the foundation.
How to Apply Barrier Pest Control Around Your Home
Start by clearing the treatment zone. Move firewood, stacked lumber, and lawn equipment at least 20 feet from the foundation. Rake back mulch to expose the soil-to-foundation junction, this is where pests nest and travel. Trim shrubs and ground cover back 12 to 18 inches from the siding. Vegetation touching your home creates bridges that bypass your barrier.
Safety gear is non-negotiable. Wear nitrile gloves, safety glasses, and long sleeves. If you’re spraying overhead (eaves, soffits), add a respirator rated for pesticide mist. Mix your product in a pump sprayer (a 1- to 2-gallon model is plenty for most homes) according to label directions. Never eyeball the concentration, more is not better and can cause plant damage or illegal runoff.
Apply in calm weather, wind below 5 mph, and avoid treating within 24 hours of forecast rain. Start at one corner of the house and work your way around. Spray the foundation wall from grade up to the first-floor sill, applying enough product to achieve visible wetness without runoff. Then treat a 3- to 6-foot band of soil, mulch, or gravel extending out from the foundation. Overlap your passes slightly to avoid gaps.
Pay special attention to entry points: door thresholds, garage door tracks, crawl space vents, utility penetrations, and exterior receptacle boxes. These spots get missed in broad applications but are exactly where pests funnel in. Use a pin-stream nozzle setting to treat cracks and crevices without overspray.
If you’re using granules, apply with a hand spreader along the foundation and water them in with a hose or sprinkler. About 0.25 to 0.5 inches of water activates the product and carries it into the soil without washing it away. Don’t water so heavily that you create runoff into storm drains or surface water.
Keep kids and pets off treated surfaces until they’re dry, usually 1 to 2 hours. Post-application, return mulch to its original position and store your sprayer cleaned and empty. Leftover mixed product should be used within 24 hours or disposed of according to label instructions, never pour it down the drain. Homeowners looking to build broader do-it-yourself pest control skills often start with perimeter treatments before tackling interior issues.
Best Practices and Maintenance for Long-Lasting Protection
A single application won’t carry you through the year. Plan on three to four treatments annually, early spring (March-April), mid-summer (June-July), and early fall (September-October) at minimum. If you live in the South or a humid climate, add a fourth application in late fall to intercept overwintering pests.
Keep a treatment log, date, product, concentration, and weather conditions. This helps you track what works, spot patterns in pest pressure, and stay on schedule. Note any breakthrough activity (ants in the kitchen, spiders in the garage) so you can adjust your next application.
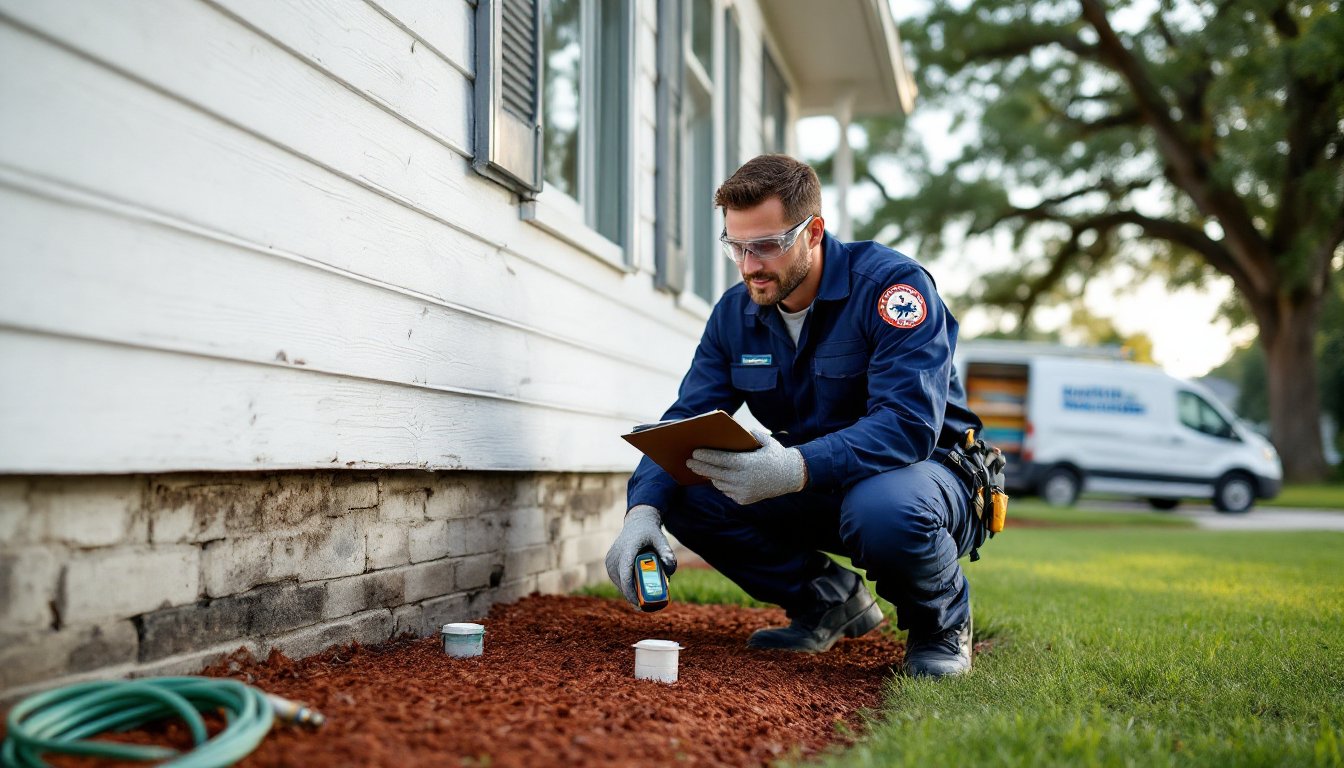
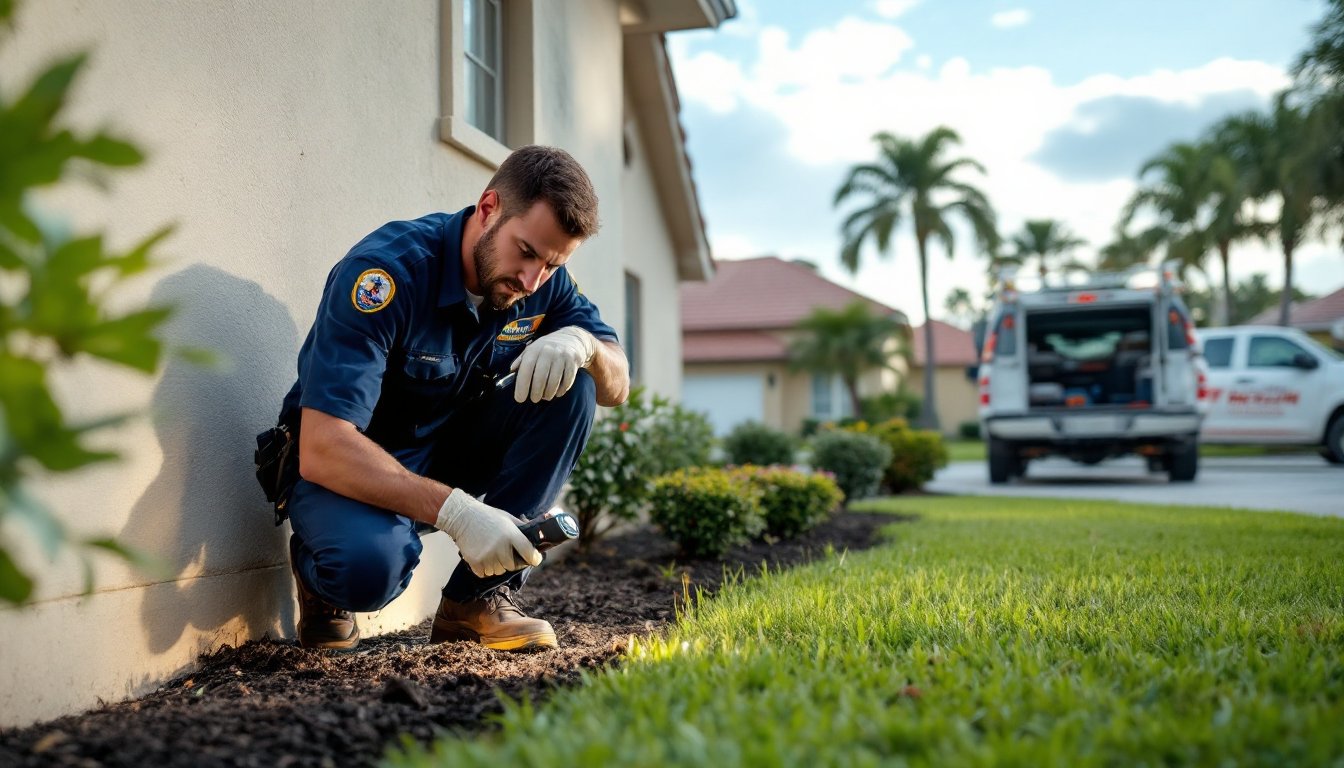
Inspect your barrier zone monthly. Look for new cracks in the foundation, gaps around windows, displaced weatherstripping, or mulch piled against siding. Any of these compromise your defense. Repair them before your next treatment. If you’re seeing persistent pest activity even though regular applications, you may have a hidden entry point, a rotted sill plate, an uncapped chimney, or a missing crawl space vent screen.
Rotate active ingredients if you’re treating year after year. Continuous use of the same chemical can lead to insecticide resistance in pest populations. Alternate between pyrethroids, neonicotinoids, and insect growth regulators (IGRs) to keep pressure on multiple biological pathways. Check product labels for the active ingredient, don’t just go by brand name.
Combine your chemical barrier with exclusion work. Caulk cracks wider than 1/16 inch with a quality exterior-grade sealant (polyurethane or silicone). Install door sweeps on all exterior doors, especially garage doors. Screen crawl space vents with 1/4-inch hardware cloth. Replace torn window screens. Exclusion plus barrier treatment is far more effective than either alone, and many pest barrier products are designed to work in tandem with physical repairs.
If you’re managing a property with a history of termite activity or located in a high-risk zone (the South, Southwest, and coastal regions), consider upgrading to a professional-grade termite barrier system. This typically involves trenching around the foundation and applying a non-repellent termiticide (like fipronil) that spreads through termite colonies. It’s beyond most DIY scopes and often requires a licensed applicator, but it’s worth the investment in high-risk areas.
Finally, remember that barriers are outdoor tools. If you’re still seeing pests indoors even though a maintained perimeter, the issue may be indoor sanitation, moisture intrusion, or structural voids that need targeted treatment. Resources like The Spruce offer comprehensive guides on pairing exterior defenses with interior housekeeping practices for a complete approach.
Barrier pest control isn’t a set-it-and-forget-it solution, but it’s one of the most effective ways to reduce pest pressure without turning your living space into a chemical fog. Treat your perimeter like a fence, maintain it, inspect it, and reinforce it seasonally. Do that, and you’ll spend a lot less time battling bugs indoors.